How to create SVG Tiny PS file for VMC
- VMC
Introduction – SVG Tiny ps
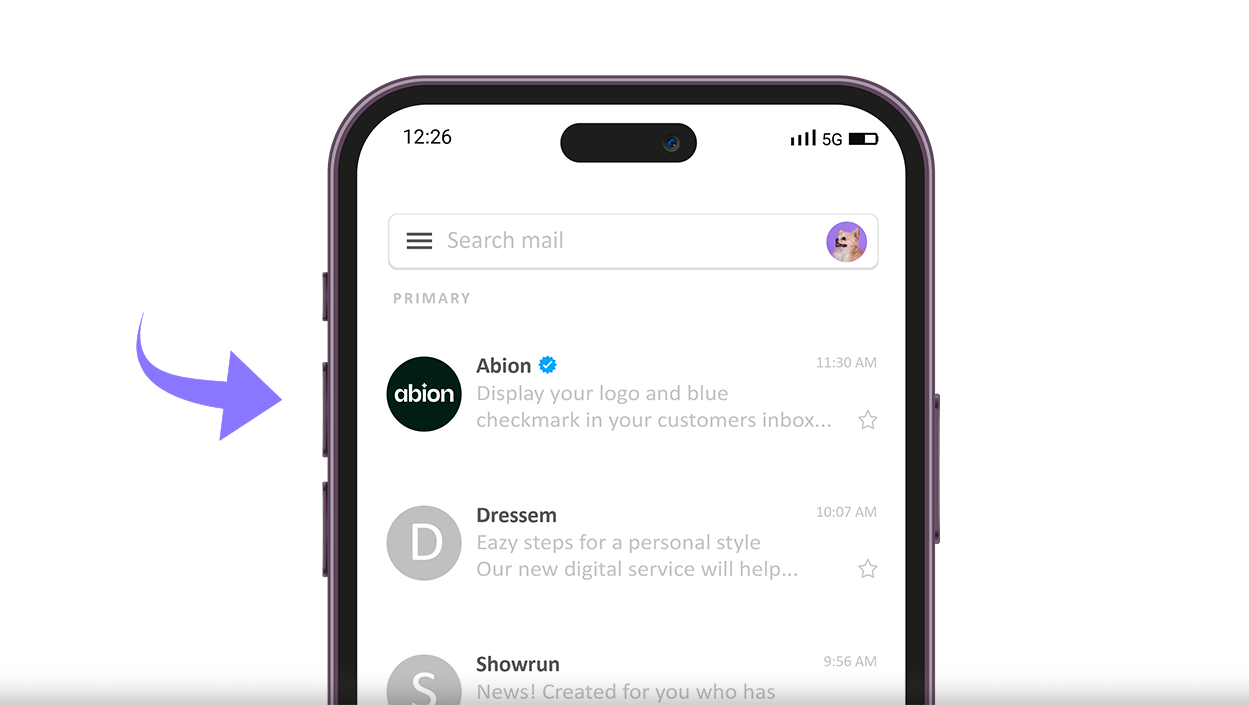
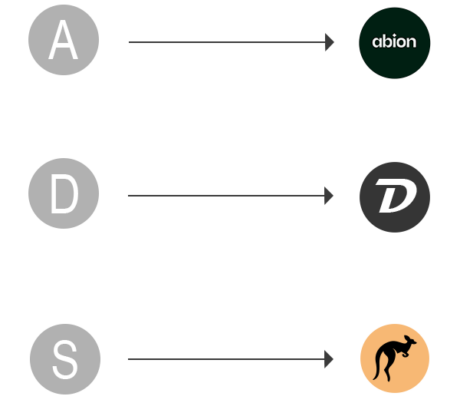
What is an SVG Tiny ps file used for? Lets explain it from the beginning. Verified Mark Certificate (VMC) enables your company to render a logotype next to your brand name in your customer’s email clients. According to trials with companies on board for the initial rollout of VMC, they increased the open rate by 39%*. VMC also strengthens security against phishing and spoofing with DMARC enforcement which can increase deliverability by 5-10%.** How cool is that?
VMC is designed to be simple, but considering how new this technology is and how the security specifications of the logos are designed, it is required that you first save your logotype to an SVG file and then you either have to make some manual changes to the file or download the conversion tool that recently launched to export the file directly to a VMC-compliant logo. Keep in mind that the conversion tool might not be 100% polished yet since it is so new.
Many companies have created their logo in Photoshop or other pixel-based software. However, this format is not allowed for the logo to be approved for VMC. The logo has to be in vector format and not pixel format.
VMC is designed as a security certificate, which is why SVG Tiny PS came into the picture. This new format of creating a file helps the VMC verify that the displayed logo is yours and only yours. Good right!
PS stands for Portable / Secure, and the specific SVG profile belongs to SVG Tiny 1.2 but is somewhat stricter in terms of the security mechanisms in the VMC certificate.
In order to be able to get the certificate issued, in addition to the logo being in the correct file, you are required to follow the remaining steps which you will find here or contact us at support@abion.com
Requirements for VMC logo – SVG Tiny ps file
- Logo must be in vector format and not pixel format
- Logo must be a registered figurative mark
- The image with the logo should be square (keep in mind that the image will be round during use and should therefore be centered)
- The format of the file must be SVG Tiny PS (PS stands for Portable / Secure)
- A solid background color to ensure that the logo is not affected by different display environments
- Do not exceed 32KB
How to create the SVG Tiny PS logo
Alright, so how do you create this new format? We at Abion are happy to assist you as a customer. Our experts are always here to help out. All you need to do is send us a vector format of your registered logo, preferably as an SVG file. We will be able to convert the logo to an SVG Tiny PS file for you. We will also assist with everything connected with the Verified Mark Certificate. Just ask your team at Abion or contact us at support@abion.com.
If you are not a customer or want to convert the logo on your own, please follow the instructions below.
SVG conversion tool
You have the option to download the conversion tool in GitHub under an MIT free open source software license, depending on whether you have a Windows or MacOS or work in Adobe Illustrator. If you do not have Illustrator and have a logo that you have already exported to SVG Tiny 1.2 format, you should download one of the standalone applications. If you have Illustrator, this script is useful as you can upload the script and easily access it from the “script” menu.
- Save the original file (vector file of the figurative trade mark) in SVG format, select SVG Tiny 1.2
- Download the conversion tool depending on which suits you:
– Standalone GUI Tool – Windows 10: A standalone application for Windows 10
– Standalone GUI Tool – MacOS: A standalone MacOS application
– Adobe Illustrator Export Script: A script that can be added to Adobe Illustrator (both Windows and MACOS) that creates the ability to convert an SVG Tiny 1.2 file to SVG PS format - Follow the additional instructions given on each selection
We are aware that the SVG Tiny PS format is so new that the converters have not yet been fully developed. There is a risk that you may encounter problems converting the logo. If this happens, it is the creators of the tool who should be contacted.
Manual changes – SVG Tiny ps
Overview, quick guide
- In Illustrator, save the original file in SVG format, select SVG Tiny 1.2
- Open the SVG Tiny 1.2 file in any code editor
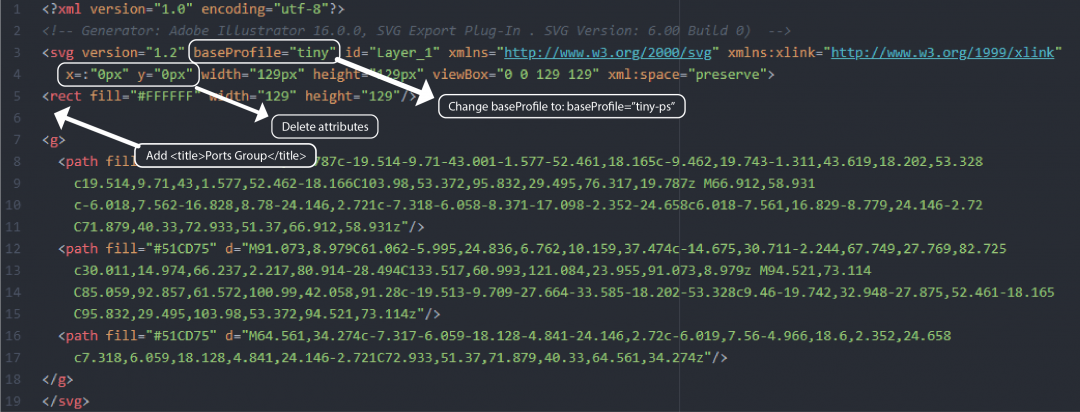
- Make the following adjustments to the XML code:
– Change baseProfile to “tiny-ps”
– Delete x / y attributes
– Delete overflow = “visible”
– Add title tag with your brand name
Step by step
Step 1: Design Your Logo
- Use a Vector Graphics Editor
- Open your logo in a tool like Adobe Illustrator, Inkscape, or Figma.
- Ensure it is vector-based and does not use rasterized (bitmap) components. - Simplify the Design
- Remove complex gradients, shadows, or effects not supported by SVG Tiny.
- Use solid fills, strokes, and basic geometric shapes. - Set the Canvas Size
- Use a square canvas, ideally 256x256 pixels or 512x512 pixels.
- Keep in mind that the image will be round during use and should therefore be centered.
- Use a solid background color.
Step 2: Save file as SVG Tiny 1.2 in eg. Illustrator
- Open your original file (vector-based with .ai, .eps, .svg) in Illustrator
- Go to File -> Save As
- You will now get a box where you name the file. In the “Type:” box, select SVG
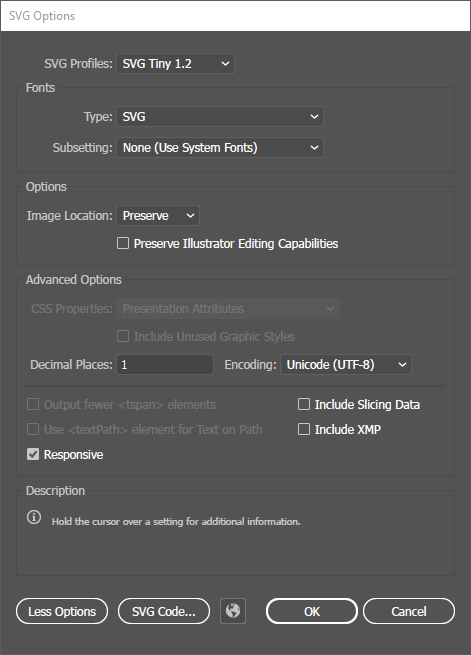
- Click “Save”
- In the next box that appears in “SVG Profiles”, select “SVG Tiny 1.2” and as Image Location, select “Preserve”

- Click “OK”
Step 3: Manual steps to convert the SVG Tiny ps file
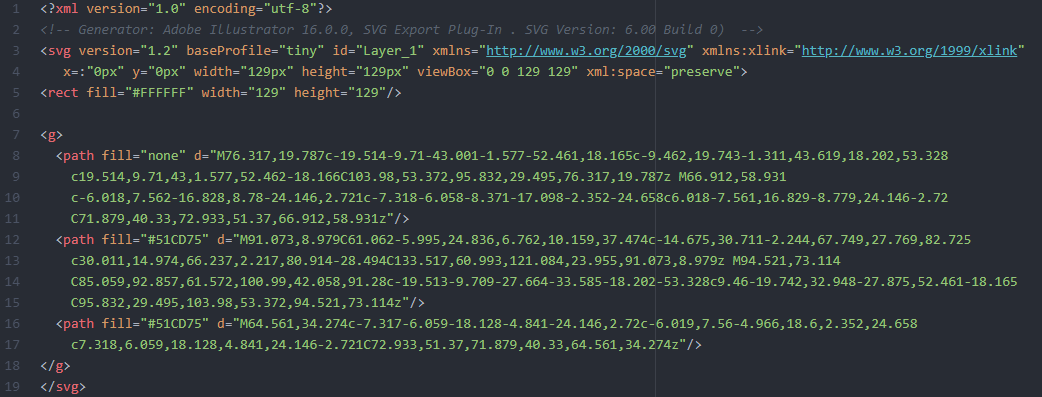
- Open the saved file in any text editor, such as Atom, CodePen, Nano, Sublime Text, Vim or Visual Studio Code
- The XML code displayed will resemble the following image

- Change baseProfile to “tiny-ps”
- Remove any “x =: 0px” y = ”0px”
- Remove any overflow = “visible”
- Make sure the file has a tag
- Add a title tag with your company name above the g tag

- Then save the file. Your new XML code will look like the following:

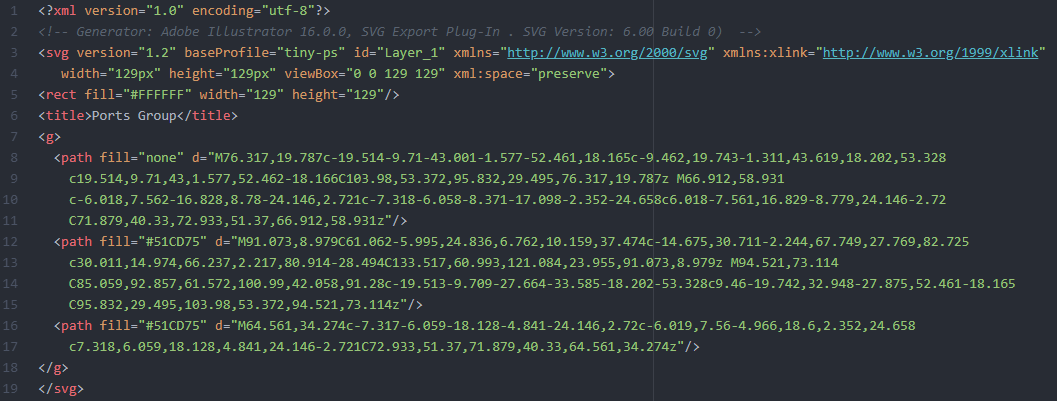
Congratulations!!
Your image is now safe and adapted to SVG Tiny PS! Provide the finalised SVG Tiny PS file to the certificate authority issuing the VMC.