
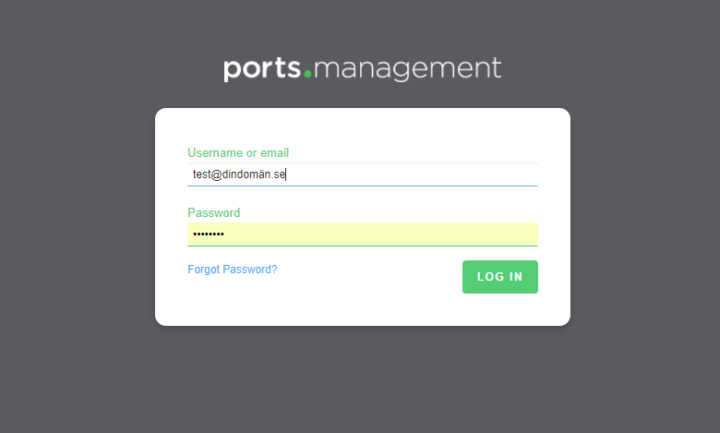
Login
If you have a DNS service with us, you can personally manage its zone via our DNS interface.
You log in with your user information via https://app.Abion Core
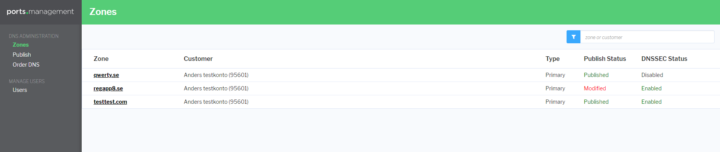
Once you sign in, the domains for which you have a DNS zone will be displayed. These can also be found in the menu selection Zones in the column on the left.
Under Publish Status, you'll see the status of the zone. If it says Published, all records are active and published. If it says Modified, a change has been made but it has not yet been published.
You can also search for the DNS zones you want to view in the search bar in the upper right-hand corner.
To make changes to a zone, simply click on the domain you want to edit.
Here you can see what the selected zone file contains and whether it is published.
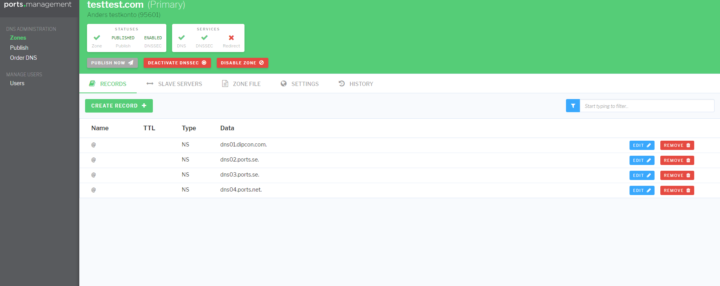
You can also navigate to ZONE FILE to see the contents of the zone file.
Add new records
There are two ways to add new records to the interface.
Option 1: Click CREATE RECORDS +.
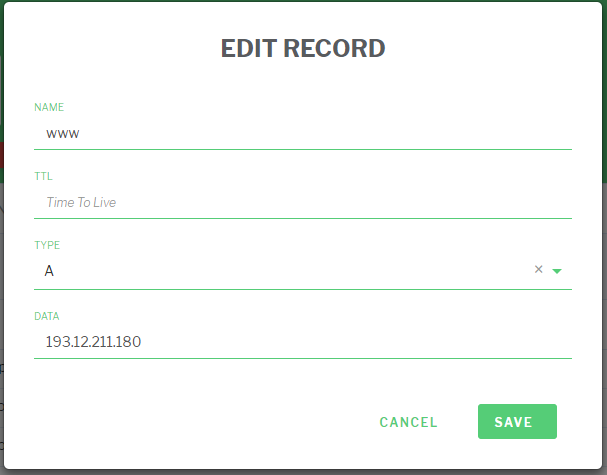
To add, for example, www.testtest.com A 193.12.211.180, do the following.
NAME: Here you can type the current subdomain. In this case, www. (the domain name is added automatically, so do not write www.testtest.com only type www). If the record is without a subdomain, this is left blank.
TTL: If you wish to have a specific TTL for this record add it here. If it is left blank, 3600 seconds (1 hour) is applied automatically. TTL is written in seconds.
Type: Here you choose what kind of record it should be. In this case, it is an A record as we are pointing www.testtest.com to an IP address
DATA: Here you can enter where the record should point, in this case to the IP number 193.12.211.180
Click SAVE to save this record.
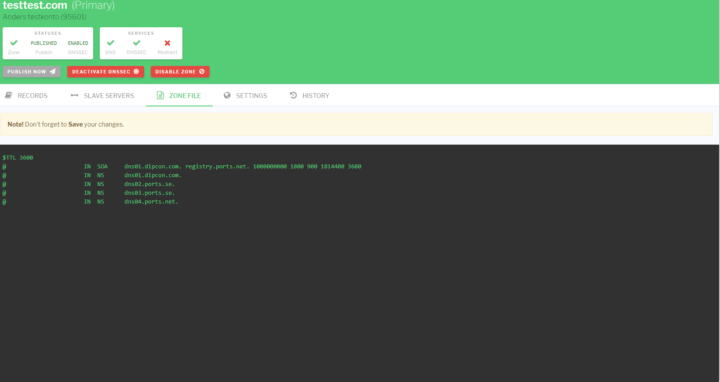
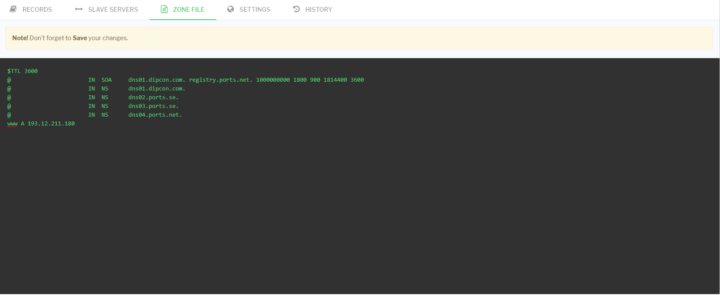
Option 2: Click ZONE FILE
Here you can enter records in free text, which can be beneficial if you are going to directly import an entire zone file.
You use the same record as in Option 1: www.testtest.com A 193.12.211.180
Remember to only include www as the domain name is added automatically.
www A 193.12.211.180
Click SAVE CHANGES to save this record. If everything is correct SUCCESS will be displayed.
The specified record is now formatted and will appear as shown below:
www IN A 193.12.211.180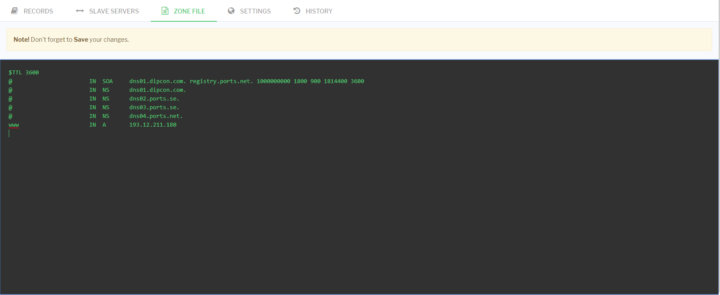
Whichever option you have selected, Option 1 or 2, you now need to publish the zone for any changes to become active.
Click PUBLISH NOW and the zone will be published with your latest changes.
The following records can be added to the interface:
- A
- AAAA
- CAA
- CNAME
- DNAME
- LOC
- MX
- NAPTR
- NS
- PTR
- RP
- SRV
- SSHFP
- TXT
Scheduled changes
If you want to have a zone change published at a specific time and date, you can plan a scheduled change. Make the changes that are presented in option 1 or 2 of Add records, but do not click PUBLISH NOW (option 1) or SAVE CHANGES (option 2) after adding the desired records.
You can also schedule the deletion of a record.
In the left-hand menu you will find PUBLISH, click here and select the zone you want to schedule. Click SCHEDULE and select the desired time.
You can also review the changes that will be published by clicking REVIEW on the far right-hand side.

Redirects
If you have purchased a redirect service, you can edit/add redirects for the zone and you will see that the REDIRECTS option is available.

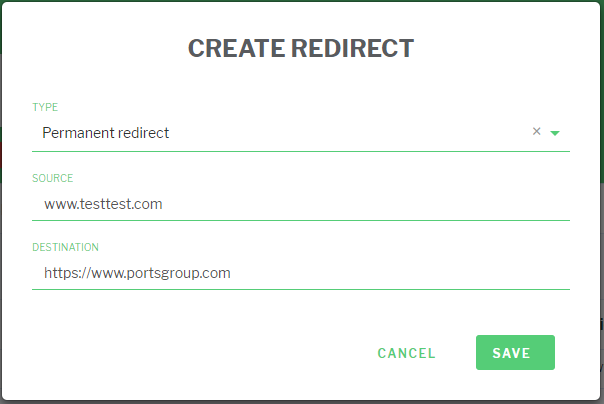
To set up a redirect, click CREATE REDIRECT +. You can now choose from 3 different types of redirects:
- Permanent Redirect
- Permanent Redirect with slugs
- Cloaked Redirect
Under Source you can write what should be redirected. In this case, we want to redirect www.testtest.com which we write in Source.
In Destination, write where the domain should be redirected to, note that you must enter http:// or https:// before typing which domain name the redirect should go to.
In this case, we want to redirect to https://www.portsgroup.com
Delete records
In the same way that you can add records in two different ways, you can delete records in two different ways.
Option 1:
Under RECORDS, you'll see all records for the zone. To delete a record, click REMOVE on the far right-hand side for the record you want to delete.
For this record to be completely deleted, you also need to republish the zone with PUBLISH NOW.
Option 2:
Under ZONE FILE, select the desired record to be deleted and use Backspace on the keyboard to delete the text.
When you're done, click SAVE CHANGES.
Change the TTL for the zone
If you want to change the TTL for the entire zone, click SETTINGS and then click EDIT SETTINGS. Here you can change the TTL.
Note that TTL is written in seconds. For example, 600 in TTL is 10 minutes.
It is recommended to lower the TTL 24 hours in advance of making a change that will be faster than the current TTL.
Click PUBLISH NOW for the changes to be made.